




Making & Modifying Maps
Adding Maps
If you want to add a map, right click somewhere in the map viewer (bottom left) and select the “New…” option:
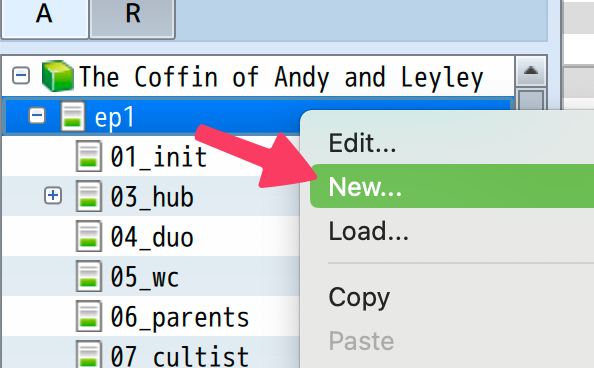
This will open the map creation dialogue. The following are the width and height values that the game uses. If you don’t know what size to use, you should use these values, even if your map is smaller:
- Width:
27 - Height:
15
Then, once you create the map, you need to mark all of the tiles as walkable. In the top right menu, make sure the “A” tab is selected, then select the tile right underneath the solid black tile:
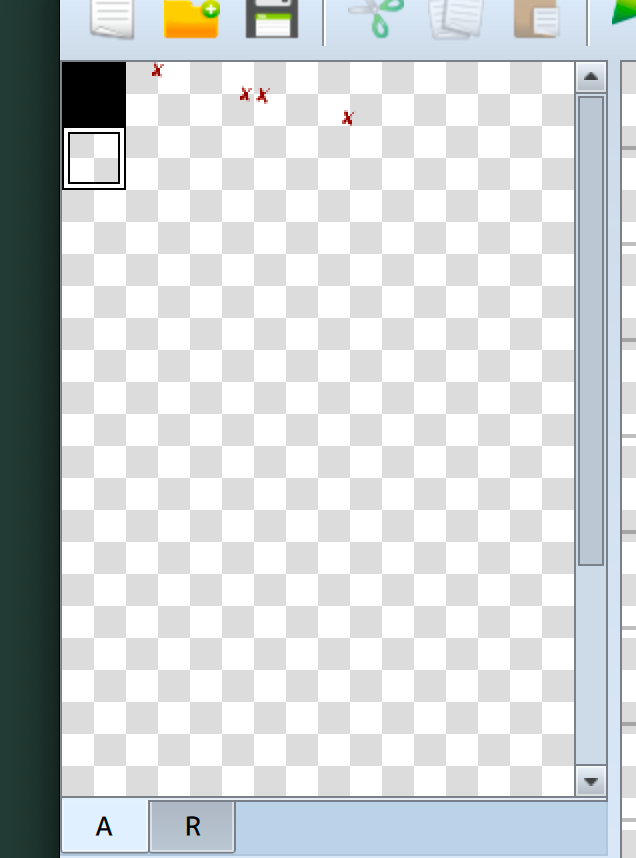
Then, click the “Map” button to switch to map editing mode, select the “Flood Fill” tool, and then click on the main scene view.

There shouldn’t be any visible change, as you’re filling it with transparent tiles. However, you can start a playtest (top right button) and verify that you can walk around in the map.
Also, make sure to switch back to “Event” mode (button with red board-game piece) in order to be able to edit events.
Boundaries/Collisions
To create the boundaries of a map (tiles that characters cannot walk through), you can go into “Map” mode, select the “R” tab, select the “2” tile, and draw the boundaries of your map.
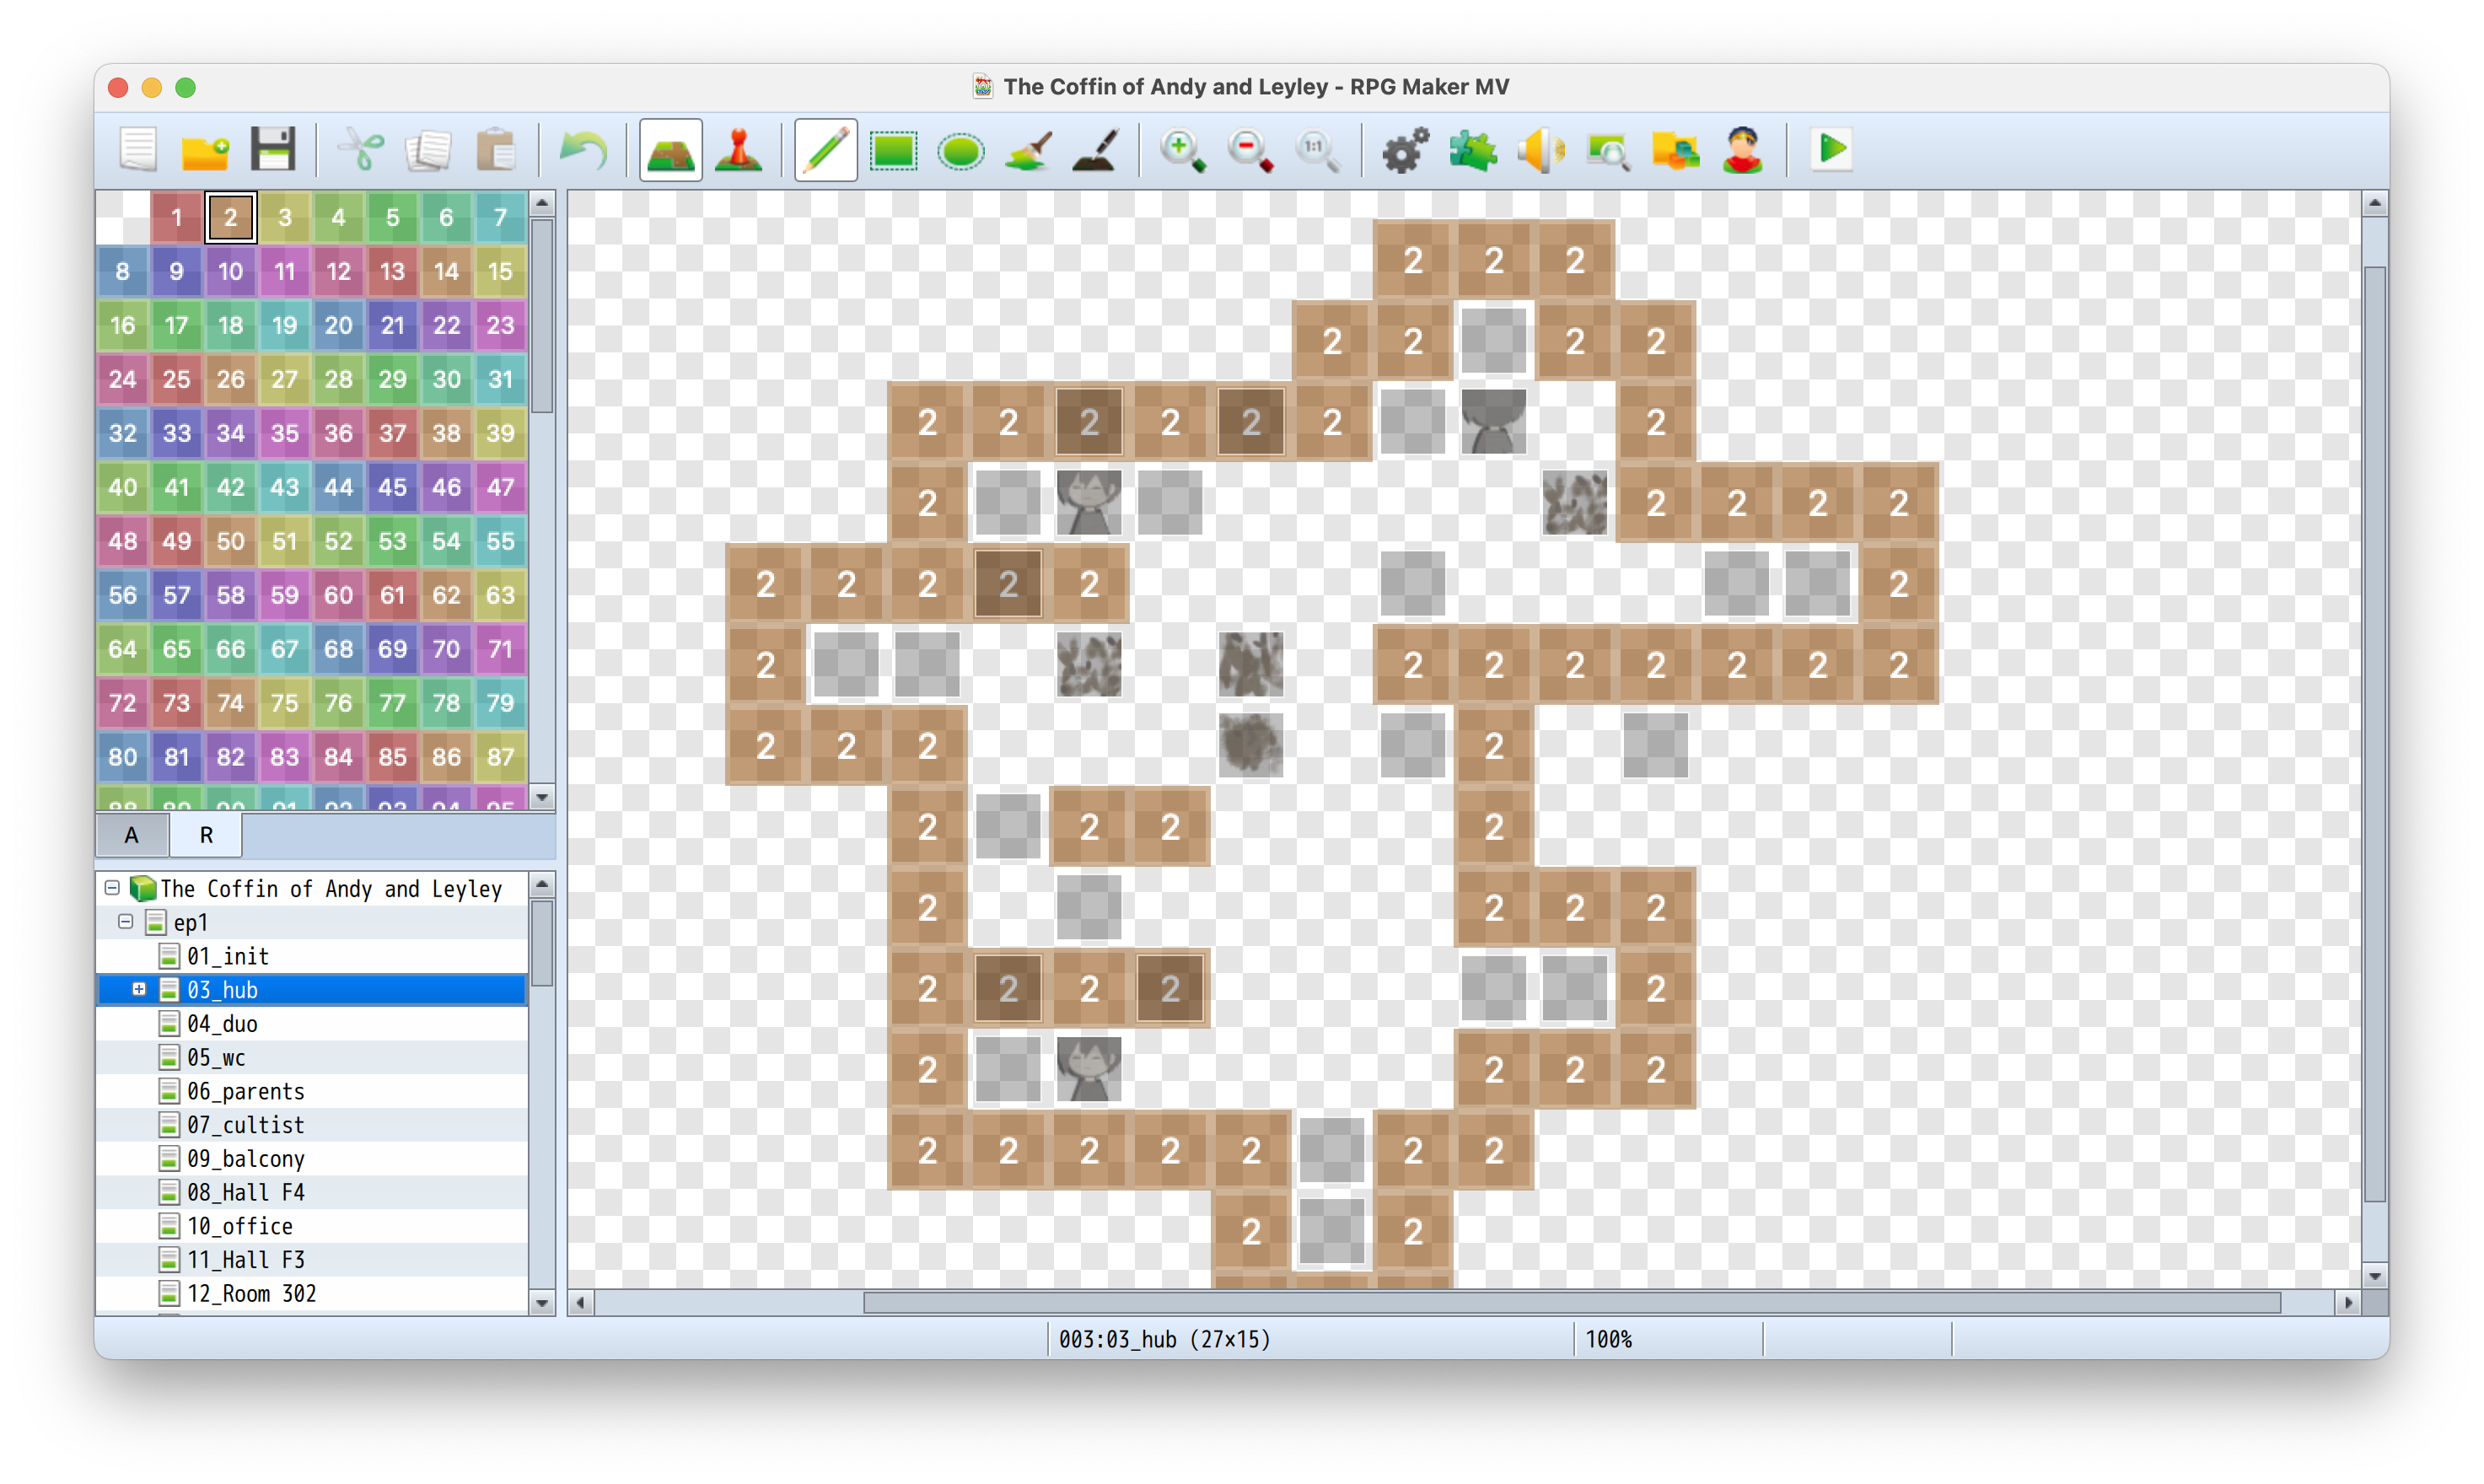
If you want to have tiles that can switch between being solid and being walkable―for example, a character that isn’t always on that position―you can set the “Priority” value to “Same as characters” in the event edit menu.
Backgrounds and Overlays
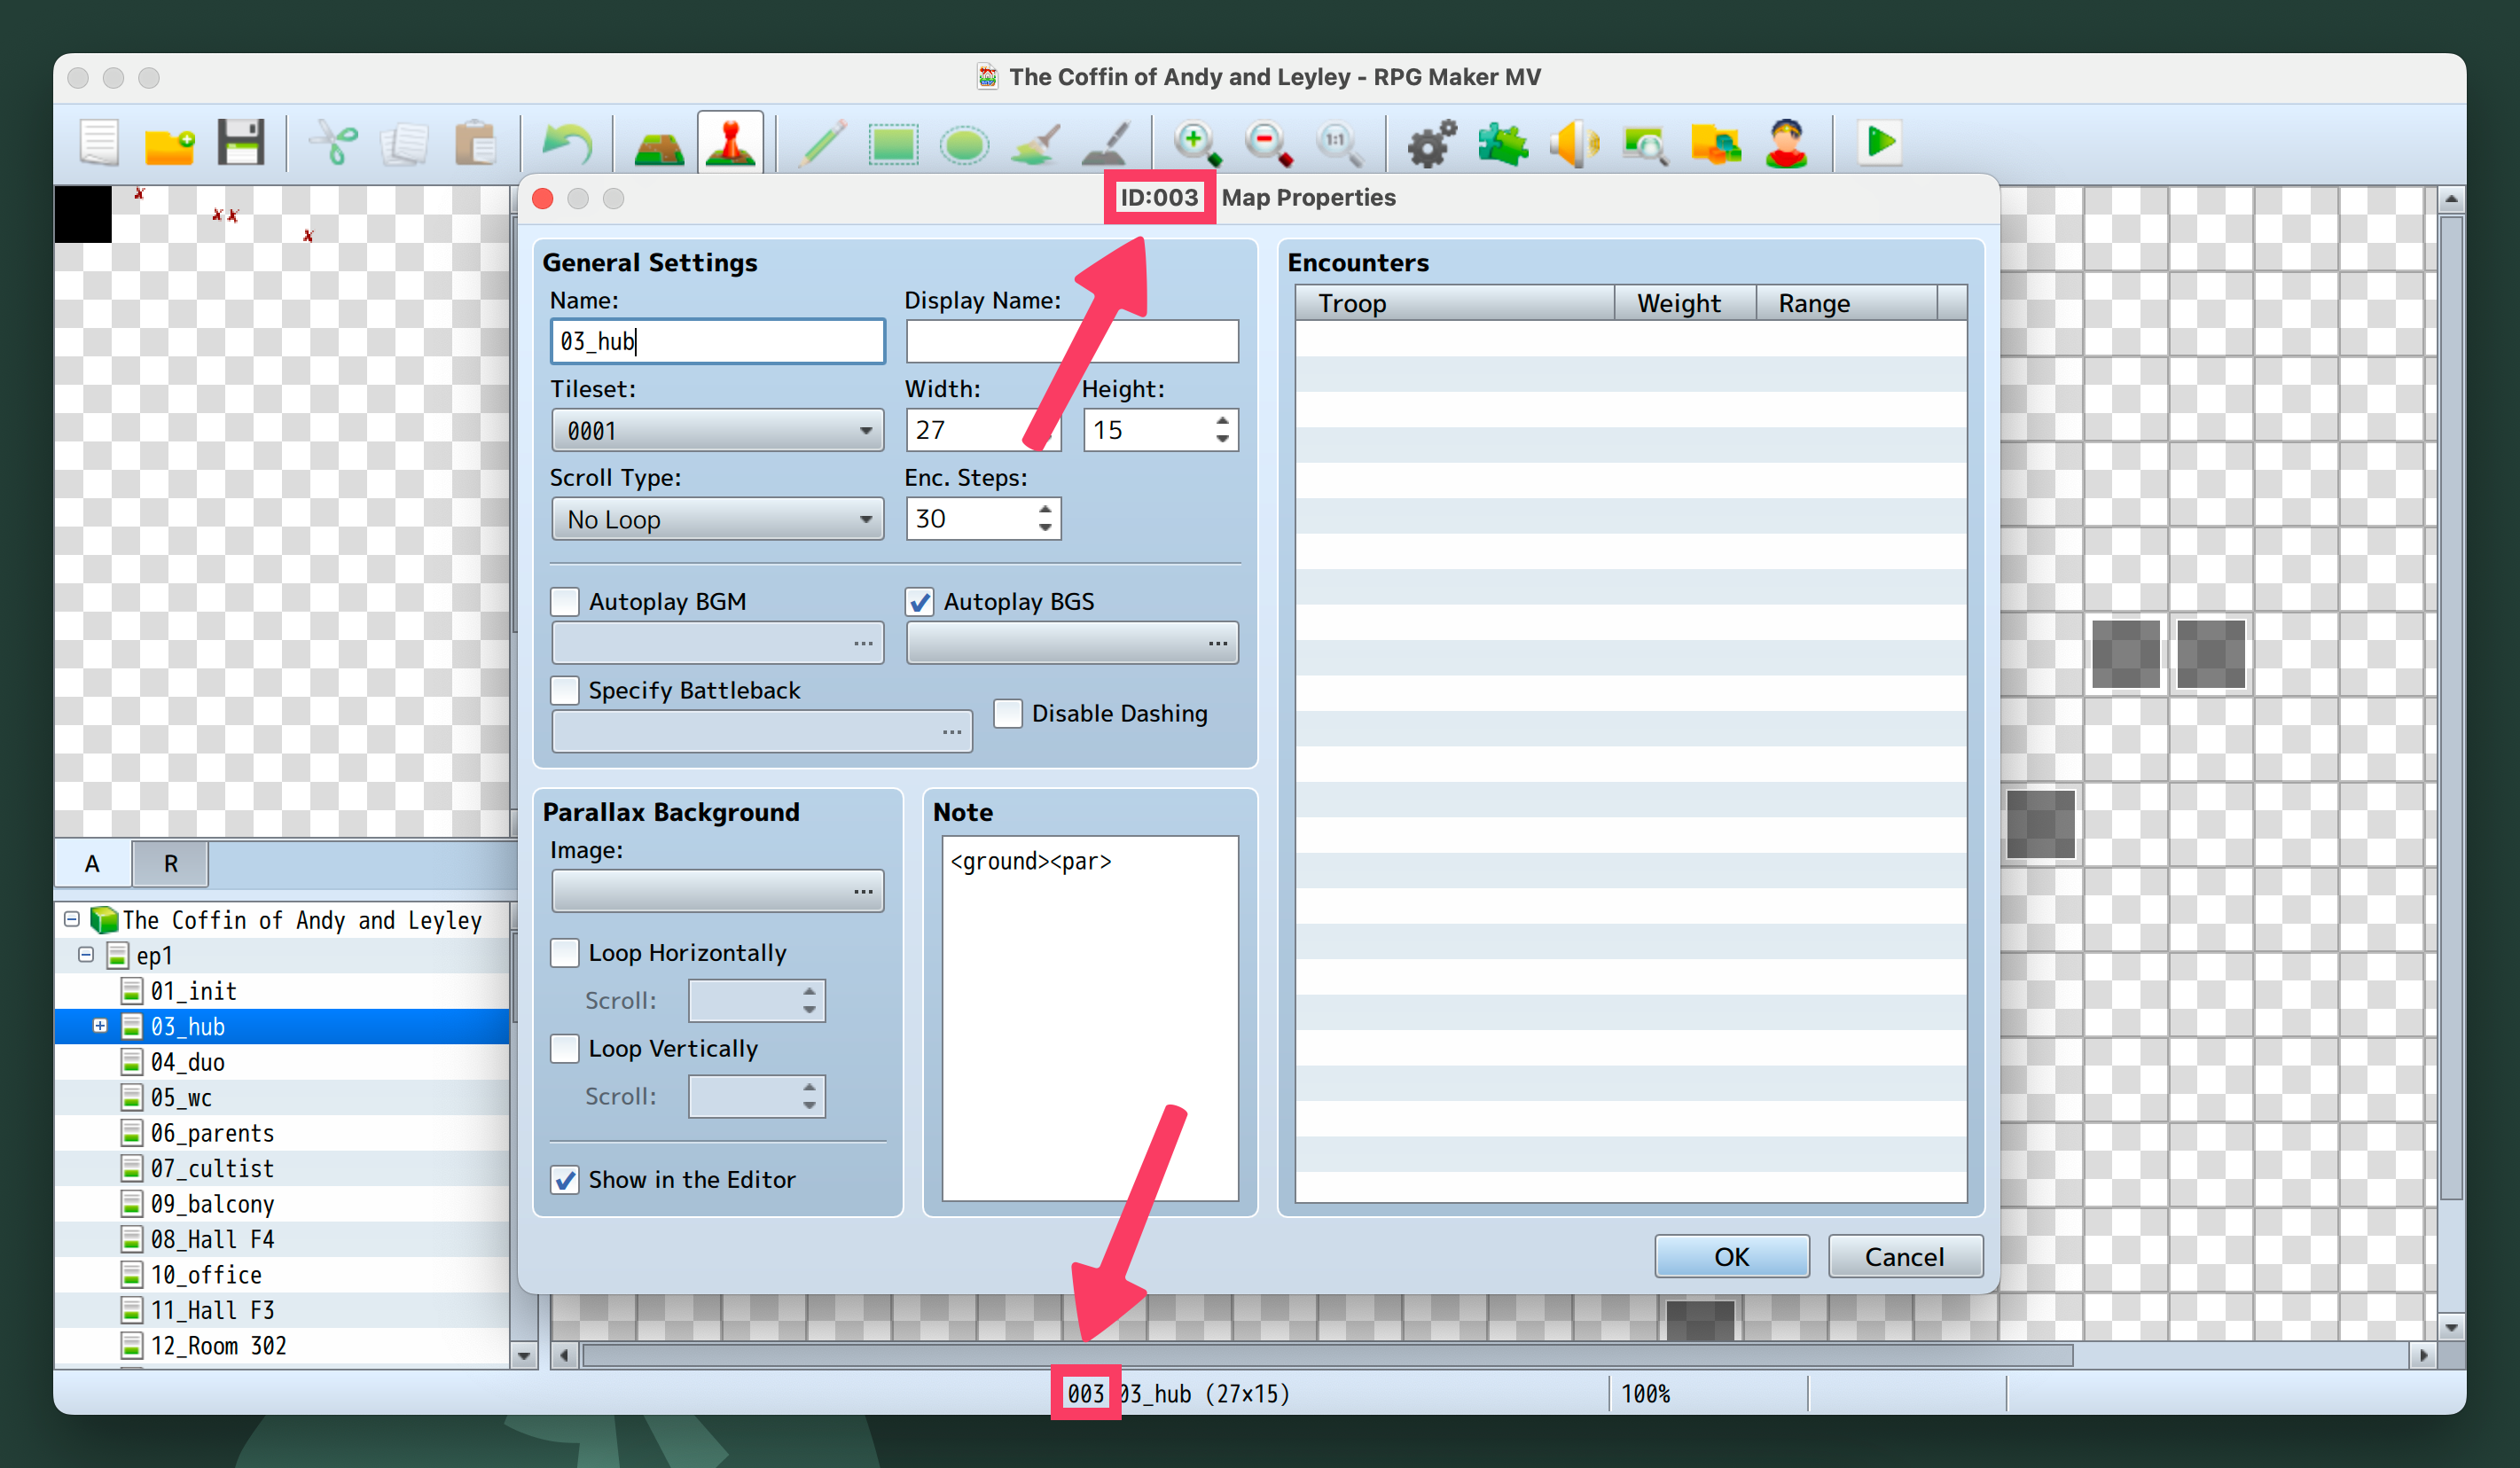
TCoAaL doesn’t use RPG Maker MV’s “Parallax Background” option to set backgrounds, and instead uses the plugin Orange Overlay. The value a map has in the “Note” field determines which parts are shown. You can use anything the plugin supports1, but the game uses the following:
<ground>- Shows the corresponding “ground” image, drawn behind the characters.<par>- Shows the corresponding “parallax” image, drawn above the characters.
Note that these must simply be present in the “Note” field. For example, if you wanted to show only a background and no parallax, you would put <ground>, and if you wanted both, you would put <ground><par>.
Images must be located in the img/parallaxes/ folder, and should be named ground<id>.png or par<id>.png, where <id> is replaced with the numerical map ID. For example, the ground image for the map with an ID of 24 would be located at img/parallaxes/ground24.png.
You can see the ID of a map at the bottom of the editor or in the title text:
Images should be sized so that the image width corresponds with the map width multiplied by 48. For example, if you had the following map size (the size all TCoAaL maps use):

Your image would have the resolution of 1296x720 pixels. When designing maps, it is helpful to make enable a grid with 48x48 pixel tiles if your image editor/art software of choice supports it.
Modifying Existing Maps
You can modify existing maps like normal, and any changes will be reflected in the final mod that the bundling tool outputs.
Footnotes
-
Check the
js/plugins/OrangeOverlay_AlteredByChancer.jsfile. ↩